Showing posts with label manicure. Show all posts

Monday, August 12, 2013

Base Coats: Are they necessary or a waste of time?


From left to right:  Essie's "Fill the Gap" ridge smoothing base coat,  Maybelline New York "Express Finish 50 Second Base & Top Coat",  ASK Cosmetics' Base Coat, 
Seche Clear - Crystal Clear Base Coat
 
You don't need to make an appointment at the salon and spend tons of money on getting the perfect manicure or pedicure.  It's possible to do it at home if you follow the right steps.
 
Experts say these steps begin with a clear base coat, which helps your polish of choice stick to your nails more easily.  A base coat also creates a barrier that in turn aids in protecting your nails from the damaging effects of nail varnish.  Base coats prevent staining and peeling, AND they will give your polished nails a more even texture.
 
Base coats come in different varieties:  plain, ridge-filler varieties and a dual purpose top & base coat in one.  Ridge-filling base coats are thicker than regular ones.  As their task is to fill in any lines, ridges and grooves giving the nails a smoother-looking appearance.
 
After the base coat dries (and it should dry relatively quickly with the exception of ASK Cosmetics' Base Coat which remains slightly tacky for better adherence of the polish), apply 2 thin coats of lacquer rather than one in order to give your nails a richer look.  Side note - by applying thin layers of polish your DIY manicure will last longer and not be as prone to chipping.  If you want to skip the coloured polishes altogether, you can simply use a base coat on its own to make your nails look shiny, but natural.
 
Finish off every manicure or pedicure with a good quality top coat to seal in the polish, create a shiny appearance and prevent chipping during wear.  Be advised that some products (Maybelline Express Finish 50 Second Base & Top Coat as seen above) combine a base and top coat functionality, but they may not work as well as the individual base and top coats.
 
So, although it may seem like a hassle at the time, base coats do extend the life of your manicure and help to avoid yellowed nails if you lean towards very pigmented shades such as fire-engine red!
 
 
Do you take the extra step to apply base coat?  If so, what is your favourite brand?

Let's get social:

Follow me here on this blog for helpful nail care tips!

Tweet with me on Twitter!
Pin with us on Pinterest!
Fan us on Facebook!
Watch me on YouTube!
Follow also via Instagram @TIPSbyASKCosmetics (that's me!)

Can't wait to connect with you - til then, Lisa


Sunday, July 28, 2013

Gorgeous Bling Bling by Essence

My fascination with Essence continues.  Out shopping I saw a new display with several summer shades.  This one in particular caught my eye and made its way into my shopping cart.
 

Gorgeous Bling Bling has very tiny speckles of bronze and gold throughout.  As you can see for the photos below this glitter effect goes on very evenly unlike some others where you have to fish for the glitters particles, and then they are all over the place and very difficult to apply evenly.  If you look closely, even the lid displays the shade and glitter very accurately.

A truly gorgeous shade - not red, not brown, definitely not orange, but a pleasant mixture of all three tones. 

It applied like a dream.  I find the Essence polishes wear fairly well - 5 - 7 days if you refresh the top coat every other day to ensure longer wear.  But who actually keeps a shade on their nails that long?

Many of you know from other posts that I always finish up my manicure with a healthy cuticle treatment of TIPS Nail Conditioner.  This product keeps my nails in great shape.  It is so simple to apply:  1 product, 1 daily application first thing in the morning, 1 step is all it takes to replenish essential lipids, protect your nails from water/chemical damage, moisturize your nails and cuticles, strengthen and fortify.

It certainly lives up to its name - Gorgeous Bling Bling.  I for one, hope that Essence brings out more of such awesome shades with a hint of sparkle in them.
 
So, thanks a million for stopping by and viewing my latest manicure.  I wish you all the best for the rest of the day.
 
And be sure to let me know - what YOU think of this shade?  Is it calling your name?
 
Take care, Lisa M
 
Stay in touch with me via FB, Twitter @nailcareasklisa or on Pinterest @ASK Cosmetics Inc.

Wednesday, July 24, 2013

Covergirl's Appletini

Wow, Covergirl really nailed it with the name they chose for this polish shade - Appletini!
 
Since I've seen so many similar shades from other brands, I just had to try this on myself.
Ones I have run across so far that might come close are
Wet 'n Wild's "Pin 'Em Slater"
&
Barry M's "Key Lime"
 
I believe this is my first Covergirl polish that I am wearing.  It applied well in two thin coats that evened out nicely.  The only problem was the bottle size and ultimately the lid and brush length.  They were much shorter than I am used to and this caused some difficulties in the application.
 
For a comparison I placed the Covergirl bottle of polish beside a bottle of TIPS Nail Conditioner, which is what made my cuticles look so shiny in these photos.  I always finish up every manicure with a healthy application of TIPS Nail Conditioner by ASK Cosmetics
 
Covergirl's bottle contains 3.5 ml (.11 oz) of product; whereas a bottle of TIPS contains 7 ml (.24 oz) of nail treatment.  So, be sure to keep that in mind when shopping for these Glosstinis.  You are getting much less than normal, so look closely at the price.
 
Next thing to consider is the brush length.....
That's how short it is.  As stated above, it was not easy working with such a lid/brush length. 
 
I love this shade, although I am definitely not a huge fan of greens.  Somehow this shade really has a summery feel to it.  I can't wait to use it in some of my nailart coming up in August.  So stay tuned!
 
Any comments from you on Covergirl, Glosstinis, green eggs and ham........
 
Thanks for taking the time to stop by.  Enjoy this wonderful day.
 
Til next time,  Lisa M
 
Be sure to connect with me via FB, Twitter @nailcareasklisa or on Pinterest @ASK Cosmetics Inc.


Wednesday, May 8, 2013

Girls just wanna have fun!

Last Saturday marked a huge achievement in my family.  It was the 50th wedding anniversary of my parents.  This is truly an incredible accomplishment, so we had to commemorate it by having family photos done by a professional photographer. 
 
My nieces wanted their nails done for the occasion and seeing as I had been having some fun myself with the funky nails tattoos I had been sent to review by Fake Tattoos, I offered to give them all cool designs on their little nails.
 
Nr. 1 in Europe regarding fake tattoos for both nails and skin - FAKE TATTOOS on FB
 
 
Needless to say, they went crazy when they saw all the different choices and wanted tattoos on each of their fingers.  It wasn't an easy decision, but here's the final look they chose....
 
Meg is a die-hard nail polish fanatic and absolutely loves nail art too.  When she heard I had tattoos to apply, she simply couldn't wait to try them. 
 
She decided on moustaches and bows.
 
Kyra chose a mixture of images.  You can see a palm tree, bows and a small ice-cream cone on her nails.  Very proud to show off her glammed-up talons!
 
These girls could have easily applied the nail tattoos themselves; they are so simple to work with.  The only problem might have been positioning them.  These nails were pretty tiny, and we had to choose the smaller tattoos for a better fit on their nails.
 
Last, but not least, Jada chose an array of designs:  a jester's hat, a bow, an ice-cream cone and a red lady bug.  They all looked awesome!
 
We finished off their simple manis with a layer of top coat to help seal the tattoo and promote longer wear. 
 
Top Coat shown here is from the ASK Cosmetics Nailwear line.
 
More to come on Fake Tattoos.....
 
Thanks for stopping by and til next time,  Lisa M.


Friday, May 3, 2013

Much better than the real thing!

 I've always thought about getting a tattoo.  However, the idea of something so permanent on my body was just too daunting.  I've even considered getting a little one in some inconspicuous spot, but it simply hasn't happened.
 
Well, I was thrilled when I was contacted by the company FAKE TATTOOS not only because I find the idea ingenious, but also because they sent me nail tattoos to try out.  This is a brilliant way of decorating your nails a little bit more than with just colour.
 
So here we go with Part 1 of my nail tattoo review........
 
Photo 1:  The tattoos in the original packaging.


About the company:  FAKE TATTOOS has reached #1 position within Europe regarding temporary tattoos, but they sell to the entire world.  They work with several famous guest designers, so most of their tattoos cannot be found anywhere else - they are originals.  They focus on fast delivery and 100% customer satisfaction..... and ..... they loooooove temporary tattoos!  (Text taken from the original letter and modified slightly for this blog post.)
 
Photo 2:  "Miss Minty" & "Bubblegum" by GOSH and the first sheet of FAKE TATTOOS entitled Hearts & Bow Design Order #CT615744.
 
About the fake tattoos:  The tattoos are easy to apply and last 3 - 10 days depending on your skin type.  The tattoos are FDA tested and totally non-toxic.  (Text provided by the company and slighty modified for this blog post.)
 
Photo 3:  Instructions for the correct application of the nail tattoos can be found on the back of each sheet of tattoo designs.

Photo 4:  GOSH shades "Miss Minty" and "Bubblegum" on alternating fingers with hearts from the Hearts & Bow Design.
 
This was my very first application of nail tattoos.  Apart from the sloppy job I did on my pinky and the fact that these two shades are becoming increasingly hard to work with, I was very pleased with the initial attempt at tattooing.
BTW -   I am really disappointed with the quality of these two, particularly as I have two other shades by GOSH, namely Berry Me and Blue Balloon, which are absolute dreams to work with and apply.
 
In any case, nail tattoos are a must-have item for every nail enthusiast.  These designs were super easy to apply.  It hardly takes any time and you are left with an amazing result.
 
 
Admittedly, I needed a few tries before I got better at lining up the tattoos on my nails so they were even.  Proper and accurate placement of these little pictures is harder than you would imagine on small finger nails such as mine, but practice makes perfect.

It is extremely fun to pick and choose the design you want with an appropriate shade of polish.  Even one tattoo on one nail would look fantastic and add something special to your manicure. 
 
So look them up and stay tuned for Part 2 of the nail tattoo series.
 
FAKE TATTOOS on Facebook - click here
 
on Twitter @fake_tattoos
(FYI - they post all their big VIP discount codes on FB and Twitter)


Wednesday, March 20, 2013

QVC Beauty Event on March 24th

I've got great news for all the QVC US shoppers out there.  On Sunday March 24th  QVC US is offering free shipping & handling on the following items/kits by ASK Cosmetics:

A-62260 - 1 bottle of TIPS for Toes

A-62259 - 2 bottles of Revival Nail Polish Remover


A-69605 - 2 x Contour Nail Files in a set
 
A-00563 TIPS 5 Piece Ultimate Manicure Kit
 

A-1859    2 bottles of the Revival Skin Conditioning Milk
 
For more information on these products, check out this page for brief product descriptions and to find out more about the brand, ASK Cosmetics Inc. of Canada.

All these kits are available on QVC's Beauty - TIPS Nail Care website.  These products and all the details about ordering can be found right here.
 
 
Take advantage and save some money on QVC this Sunday, March 24th. 
 
See you soon,  Lisa M.


Thursday, March 14, 2013

The Luck of the Irish - St. Paddy's Day Mani

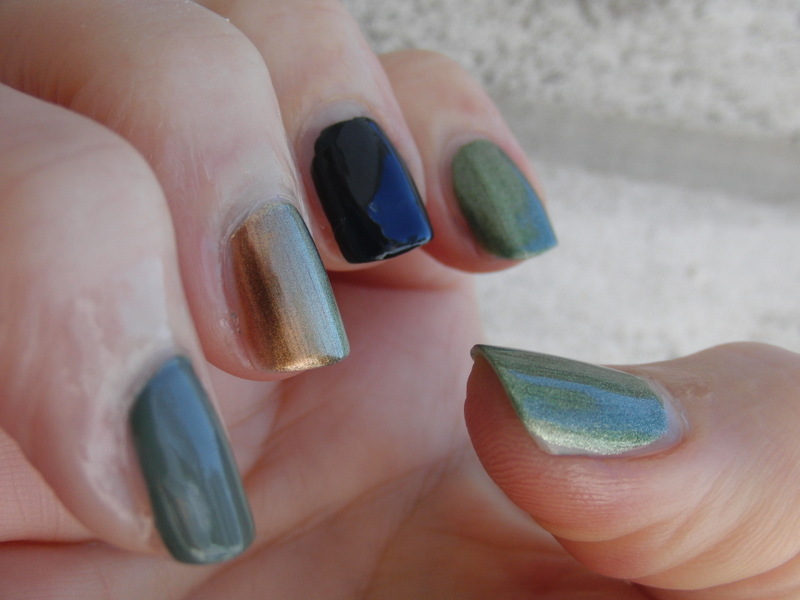
I was very surprised to find a number of "greenish" shades in my polish assortment.  Typically I wouldn't buy green polish, but these must have caught my eye somehow on my shopping trips.
 
Which one would you choose as a St. Patrick's Day manicure?

From left - right:  "Rags to Riches" by Rimmel London, "Stylenomics" by Essie, "Plume" by Sally Hansen and "Spanish Moss" by Revlon.
 
Sorry, they are hard to see in this shot.  I was playing around with my new camera and didn't seem to get the lighting quite right.  Will do better next time!
 
Thumb + Index finger have "Rags to Riches", Middle finger has "Stylenomics", Ring finger has "Plume" and Pinky finger has "Spanish Moss".  These are all 2 coats with indoor lighting no flash.


Well, there they are.....but not all of them really look like green shades. 
 
Your choice for St. Paddy's Day would be......
 
Thanks for stopping by.  Til next time,  Lisa M.